Showing posts with label large/small scale. Show all posts
Sunday, 23 November 2014
Quilt No 3 Change of scale: Mended Door
Quilt number 3 finally completed after several months marinating on the design wall. The smaller scale area is a photo of part of a patched, mended door with newer wood inserts among the old on Queen Charlottes Cottage in the grounds of Kew Gardens. The larger scale shapes and colours are based on some of the sections of the photo, a mixture of African batik, hand dyed and monoprints with acrylic paint. I used different weight threads ( 40 and 12) in these areas to further emphasise the change of scale.
I'm not having much luck with my measurements when cutting down for binding, This quilt is actually 40 x 79 cm as the quilting with 12wt thread drew up the fabric more than anticipated. Red Stapelia is 39 x 80 cm as I made exactly the same mistake as I did with grey fingerprint quilt despite writing down all the measurements!
Tuesday, 29 July 2014
Better late than never...
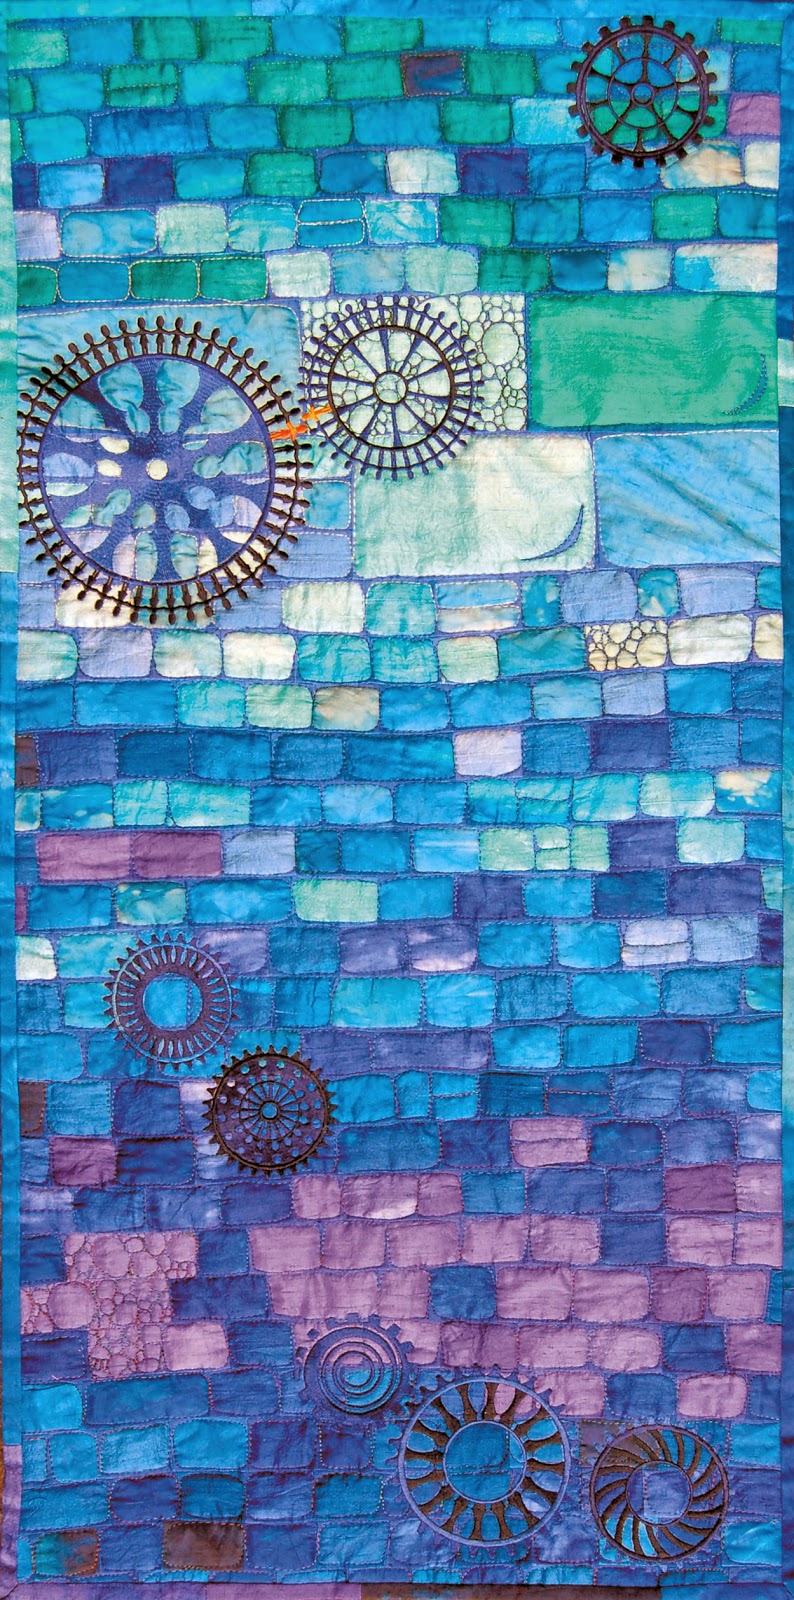
I know I'm one month late - but HEY! I finally made it! Here is my piece for the big and small challenge.
The title is "David and Goliath". The big gear wheel and the small one next to it are made up of small figures - pawns in the big clockwork of life.
The gear wheels are all my original designs, digitized with the Bernina software and stitched out by machine on a background of hand dyed silk.
I enjoyed working on this one - it took me a long time to settle on an idea, but once that had happened, it just sort of fell in place all by its own.
Now, while I'm at it, I might move on to the next challenge right away.
Monday, 14 July 2014
Only two weeks late... Challenge 3 finished
After Kathy had left I got started on my assignment no. 3, which had been hovering in my mind for a while now. It all had started with this fabric which I just had to have when I saw it:
At first I thought I might give a part of it to Kathy for her birthday, because she likes stripes so much, but when ideas started popping up in my mind I turned really selfish and decided I would keep all two meters that I had bought to myself.
First I cut 1" strips of the striped fabric and arranged them between dark blue strips that kept getting wider in quarter inch steps.
The narrow striped strips were folded in half and ironed, and sewn between the strips, extending out a little bit. Then I cut 2 wider pieces of unequal width, and 5 small strips in perpendicular direction, turned three of the narrow ones upside down and put it all back together.
Quilting is sparse - and due to my current strategy of avoiding having to sink threads this results in dangling ends of thread on the front.
And good I did not to give any of this fabric away (sorry Kathy!) - I have more ideas and will probably use all of it up completely in a larger piece, once I have completed all my quilts for the exhibition in Alfeld in October.
This was fun - looking forward to starting on Barbara's assingment no. 4.
At first I thought I might give a part of it to Kathy for her birthday, because she likes stripes so much, but when ideas started popping up in my mind I turned really selfish and decided I would keep all two meters that I had bought to myself.
First I cut 1" strips of the striped fabric and arranged them between dark blue strips that kept getting wider in quarter inch steps.
The narrow striped strips were folded in half and ironed, and sewn between the strips, extending out a little bit. Then I cut 2 wider pieces of unequal width, and 5 small strips in perpendicular direction, turned three of the narrow ones upside down and put it all back together.
Quilting is sparse - and due to my current strategy of avoiding having to sink threads this results in dangling ends of thread on the front.
![]() |
| Pulled all thread ends to the front, tied the pairs together approx. half an inch away from the fabric, and then cut them to approx. same length of "turned around my index finger once". |
![]() |
| Because the threads are not weighted, they stick into different directions. |
And good I did not to give any of this fabric away (sorry Kathy!) - I have more ideas and will probably use all of it up completely in a larger piece, once I have completed all my quilts for the exhibition in Alfeld in October.
This was fun - looking forward to starting on Barbara's assingment no. 4.
Monday, 30 June 2014
What I'm not making...
With the challenge of a change in scale, my first thought was to continue my explorations based very loosely on paintings by Prunella Clough , with a picture of a whole door embedded in a detail showing textures of that door ( as in Anavriti II below )
So I used a section of the photo below, printed out on cotton and then had a fine time searching through my stash to find orangey fabrics with interesting wood-like marks.
But it wasn't doing anything for me so I'm starting again with the photos that inspired this 2009 journal quilt below based on door of Queen Charlottes Cottage in the grounds of Kew Gardens. Simpler , more interesting shapes, contrast in tones and lots of interesting details in the wood grain should do nicely. I've gathered together my fabrics, just working out the construction so apologies that it will be a little late. I do hope to be able to pass my quilts over to Uta at FoQ so that's a deadline to work to .
Ps Found an old blog post in my searches where I recognise my procrastination and need of deadlines in 'Student Syndrome'. I do generally achieve what I want but the stress levels are high!
Friday, 27 June 2014
Third assignment -- almost done!
I thought I would be able to get my third quilt finished by the end of June but I need a couple more days. And I won't be back in the studio for three weeks, because I'm off to Europe -- where I will be visiting with Uta on the way to a family reunion. But there's enough of it finished to show a picture.
The back story on this quilt is that a couple of years ago I made a quilt inspired by a photograph by somebody in my art book club. You can read about it on my blog here and see a picture of the quilt.
I didn't think the quilt was worth finishing, but I loved the way the stripes worked together, especially the places where the regular pattern was interrupted and distorted. Ever since I have been meaning to make another quilt to explore what can happen with stripes.
So this is what I have come up with, and best of all, I'm fulfilling the requirements of the challenge at the same time that I'm making something I have wanted to do for a long time.
When I get home and finish the quilt I'll post another photo.
Saturday, 18 January 2014
Challenge #3
Hi all --
I am going to pose the next challenge even though the current challenge is not technically due till the end of next month. We sometimes have some open spaces in our calendars to get started early, and even if not, we always think about our next pieces for quite a while before we actually start sewing. So I thought I would get this up right now.
As I count the months, challenge #3 is due at the end of June, so we have plenty of time. (Tell me if I have calculated wrong.)
I suggest we use the same size as before -- 40 x 80 cm, in portrait orientation (tall and thin). The challenge: have part of your quilt be in large scale, and part of it in small scale.
That means part of the quilt will have large pieces, and the other part will have small pieces. Or if you're working in surface design, part of the quilt will be relatively sparse and the other part will be dense. Or one part will have big flowers and the other part will have small flowers. Or whatever other way you choose to interpret your "scale."
Here's an example of what I'm talking about. This is my Quilt National '11 piece. The yellow part on top is relatively sparse (large scale) , while the green part on the bottom has lots more lines and tinier bits of fabric in between (small scale). At least that's how I would interpret the challenge for my own kind of piecing. You will no doubt interpret it differently for the way you like to work.
By the way, following Mags' comment on her thumbprint quilt earlier this week, I think it's perfectly OK to use the 40 x 80 size as a general approximation, not an exact measurement. It's hard to make a quilt come out to an exact size, no matter how careful you are. Quilting takes up some of the fabric, and it's hard to tell in advance how much bigger you should make the top to compensate. The only way to get a perfect size is to make the quilt deliberately too big, quilt it, then be prepared to cut off whatever you need.
I think that leads to bad design -- I sure don't want to have to wait till the very end to find out that my piece is two inches too big, and then have to decide whether to cut it off the right side or the left side. I have already decided that I want that much of an edge for reasons of design and composition and I don't want to have to cut it off. Or even worse, have to add some on because the quilt ended up a bit too narrow.
So I think we all should shoot for 40 x 80, or whatever size the assignment calls for, but if we end up a bit off that's fine. The quilts will all look fine in a gallery if they're all pretty much the same size and shape. At least that's my opinion. What do you all think?
Subscribe to:
Posts (Atom)